I invite you to join us at the UW for my program. First class is Saturday, 9/28/2019. Bring your desire to succeed and your willingness to work hard.
Here’s the link, check it out:
https://www.tacoma.uw.edu/professional-development-center/photography
Recently the University of Washington-Tacoma has commissioned me to create a one year professional photography program. We’re scheduled to kick off in about 5 weeks!! Hard to believe it's happening so soon.
Leading up to this date, I’ve decided to provide a few thoughts about photography to allow y’all to peer into a few of the topics we’ll be covering.
I’ve lived in Tacoma now for over two years. One of my favorite pastimes is to walk around Wright Park. For those of you not familiar with the area it’s a beautiful 27 acres filling out 10 city blocks. The land was donated in 1886. Besides the many activities I enjoy seeing in the park often there are a number of portrait sessions with families, high school students, brides, to name a few.
The late afternoon light is gorgeous. The subjects are often placed with their backs to the sun and afternoon light. It glimmers through the trees. As the photographers snap away I watch in earnest as many work with no apparent idea of the delicacy and difficulty of “back lighting” or "fill light".
A definition: Fill light is a form of supplementary light mainly used to lighten shadows in an image.
They either do not know of “fill light”, or they have not mastered the art of the fill or perhaps, they do not care. I ask myself, "Is it a 'fix it in Photoshop' attitude?"
(Note: not all backlit subjects need fill light but most do. Additionally, available light photographs may be beautiful. I’m speaking to the vast majority of backlit portrait setups.)
Here’s the simple breakdown on conquering backlit situations.
If one has a bright light source behind the subject, .e.g. the setting sun, a bright window, a beautiful but bright sky, then more light is needed on the subjects face/bodies to separate them from the background, or upon post-production not needing to fix an overexposed background in order to show detail in one’s subject. Manual exposure is called for to determine the perfect f-stop and shutter speed (also referred to as exposure). Technically untrained photographers may have no understanding or appreciation for manual exposure or the different outcomes of "fill" or "no fill".
The idea of a fill light is to properly expose for detailed background and then add a fill light to your subject to create a beautiful frontal light source that provides an exposure balance between the foreground/subject and background. Here are a few examples.
I was working with a family near the Bainbridge ferry. Here are a couple of test shots to determine fill and exposure. The flash did not fire on the “left” image. The image on the right, it fired properly.

No on the Left. Flash fill on the Right
These two images, side by side, with ONLY contrast to bring the two father’s faces to approximately the same values. Otherwise, there are changes.
So, what do you see different?
The image on the left:
•the shadows around the eyes remind me of a raccoon
•the flatness of the subjects
•the sky is over exposed and lacks detail
•with no light reflection in the eyes the subjects look lifeless
The image on the right:
•gives detail and texture to the face and bodies
•reduces or eliminates unwarranted shadows
•the sky has detail in the clouds
From my initial exposure measurement with the fill flash I determined I needed one less stop for the background sky. The final image had these revised exposure setting.
Here’s a final fun shot from the location:

A second example: My wife and I were on a Kona hiatus and I offered to take some sunset shots of our neighbor who was pregnant with her first child. I had only my camera and no immediate way to add a fill. So, I improvised.
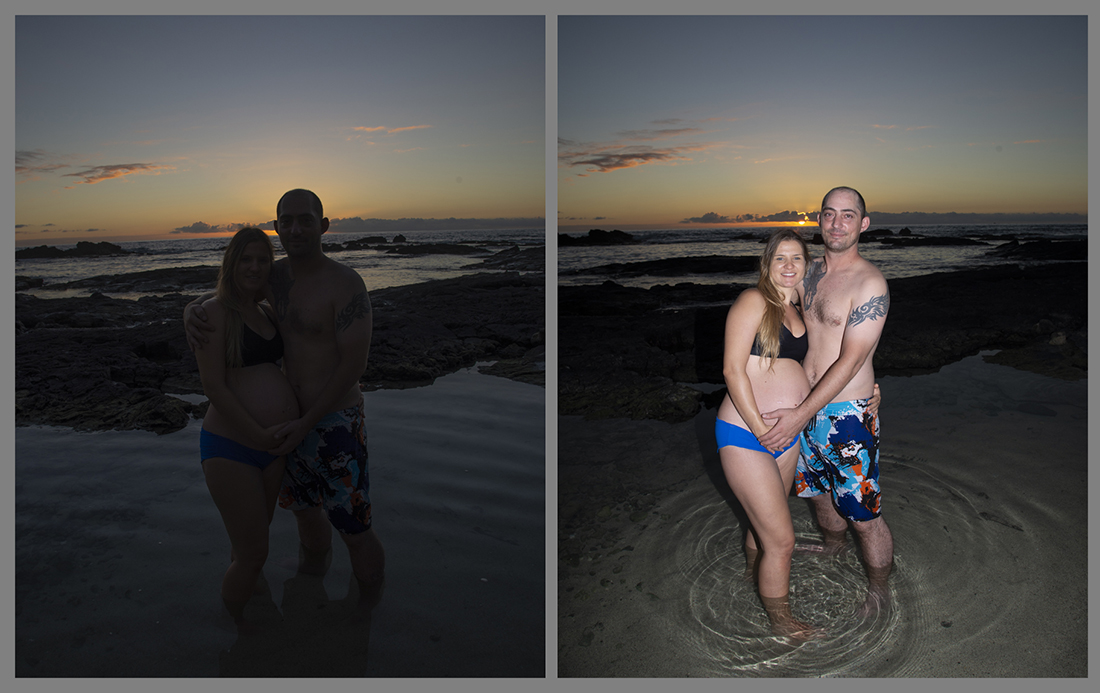
No Fill, manual exposure for sunset. Fill added, completes the image and highlights subjects.
• Using MANUAL on my DSLR, I exposed for a beautiful rich sunset.
• The image on the right was adding my fill.
Other than some contrast neither has been retouched. I believe the differences are apparent.
Here are the final images:
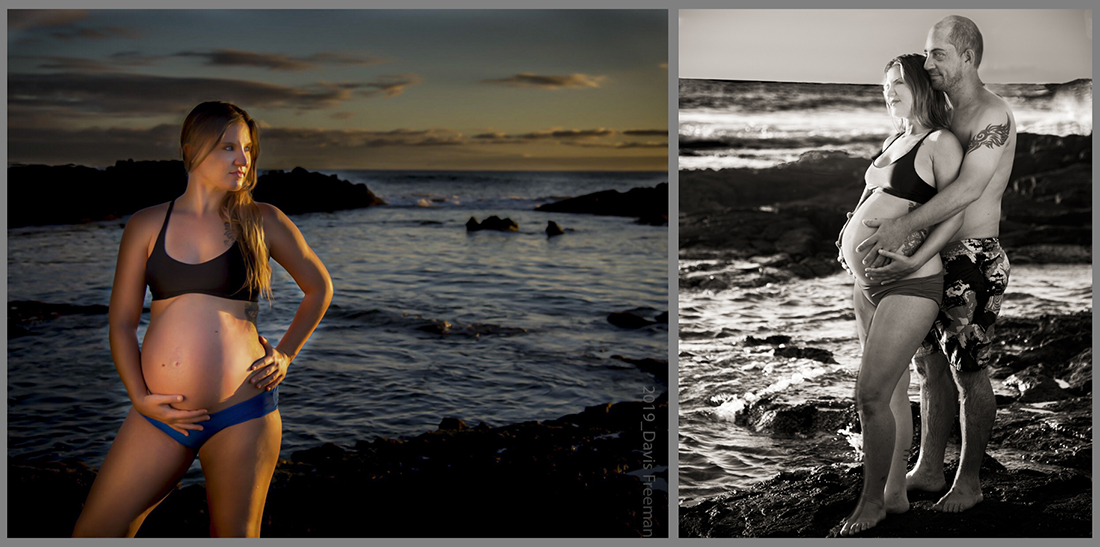
With these two photos I put in the extra time to bring them to my vision. However, little time was spent on worrying about balancing the backlight to the subject. This saved a great deal of time to spend on the subject and composition (and add $$ to my bottom line).
To learn more about these techniques, please consider my UW-Tacoma course. Again, here’s the link:
https://www.tacoma.uw.edu/professional-development-center/photography